Packing detour

2014-06-06 08.43.01

Garage door opener brace

Evening-before-last, I pushed the button to close the garage door, which was soon followed by a horrific crash sound. The lawnmower was in the way of the door, but somehow it didn’t trip the safety light to keep the door from closing.

Thankfully, I think the mower is ok. Unfortunately, the brace that holds the garage door to the opener along the track was completely off. What’s weird is that there are holes for three bolts in the brace, but there were no bolts on the ground or anywhere in the vicinity! I don’t know how the brace was attached previously, but I couldn’t make odds or ends of it.

I was too tired to deal with it yesterday, and although my stepdad offered to come over on Saturday when he gets back to town to fix it for me, I decided that since I’m working half-days this week, I could just go to the store this morning and buy some bolts to fix it myself. Ta-da! It works like new.

I’m so tired from sorting, purging, and packing. I haven’t gotten nearly as much done this morning as I intended (obviously, since I’m sitting in my arm chair typing this post!), but fixing the door was a necessary detour.

The mover inventory guy also came over earlier this morning to take notes on all the furniture, estimated boxes, etc. It didn’t take long to walk through the house, garage, and yard, but it was eye-opening to go room to room and realize just how much there still is to do. Ugh. I tried going to bed early (before 10pm) last night, and I slept hard, but I’m still pooped. My summer class starts tomorrow morning, so that’s a few more hours that I won’t be able to work around the house. I’m grateful for the opportunity to teach, and goodness knows that the money will be handy, but zzzzz … I sure would like to sleep in! 🙂

DIY Replacing a Toilet

I have changed the flapper, adjusted the chain, replaced the whole inside guts of a toilet tank, and plunged more than my fair share of toilet bowls (especially with five boys in the house). I finally decided that I’m tired of constantly trying to fix them, and I just need to upgrade to a toilet that does what it’s supposed to do on the first flush, every flush. So, this is how I spent part of my day off today …

I’ve been researching options for a while, starting with auto-flush sensors. I realized that not only are these very expensive, but they could be problematic if the toilet is clogged. The last thing you want to do in that situation is flush repeatedly! (Spoken from experience, I might add.)

The problem, as I see it, is two-fold: 1) Water-saving toilets are a pointless, ridiculous invention. It doesn’t save water if it takes three flushes to get everything down the drain! 2) Flappers frequently need to be adjusted and/or replaced, and if I add up all the money I’ve spent fixing them, I could’ve probably bought a new commode.

So, I bought a new commode.

I really need to replace all three toilets in the house, but I decided to start with one and be sure that I could handle it. Besides, the installation fee offered by the hardware store cost more than the commode (!!), so being the stubborn frugal gal that I am, I wanted to see if I could do it myself. I’m sharing the adventure with you, so you might feel more confident to try something like this, yourself.

2014-04-18 15.18.54My 14 (and a half) year-old helped me with lifting , as well as some of the work that required squatting down on the floor, like loosening bolts. They were pretty badly rusted, but with the help of some WD-40, we made it work.

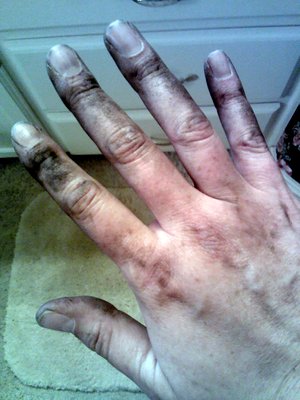
(As with my foray into washing machine repair, I would not recommend replacing a toilet as a one-person job — it can be quite heavy.)

It certainly wasn’t a graceful endeavor. I put a throw pillow in the bathtub to rest my knee on as I straddled the edge of the tub so I could reach the toilet. It wasn’t pretty, but it helped!

Disconnecting the old toilet wasn’t very complicated — it was just a matter of turning off the water supply, disconnecting the hose and loosening the floor bolts. First, we flushed the toilet to get the water out of the tank, but there was still some left in the bowl. Be sure to have some towels handy, because water will leak out from the hose and/or the base when you move it!

2014-04-18 17.00.402014-04-18 17.00.33The next part was pretty gross, but I just kept reminding myself that it was only wax. For the record, whoever decided to make the wax rings for toilets the same color as poop has a sick sense of humor. Why not make them out of clear wax? Eww.

The photo on the left shows the hole beneath the toilet that goes into the sewer. I have already scraped off the old wax ring and adjusted the new bolts in place. The photo on the right shows the new, albeit still disgusting-looking, wax ring in place on the new toilet, ready to be squished into position and bolted to the floor.

2014-04-18 17.09.23At this point, it was just a matter of tightening bolts — first the two on the floor, then the three in the tank.  Then, I connected the hose and turned the water back on. Oops! I didn’t tighten one of the tank bolts firmly enough, and it started dripping. Turn the water back off, tighten more, repeat.

2014-04-18 17.21.14Check out the canister in the tank. It came completely assembled, so I didn’t have to do anything with the mechanism. There’s no flapper! It is supposed to flush more efficiently, more powerfully, and best of all — not clog. If I never have to plunge this commode again or waste clean towels by sopping up an overflowing toilet, then it will be money very well spent!

Voila! One down, two to go …2014-04-18 17.45.49

Car: 0, Ang: 1

When I noticed that one of the headlamps in my car had burned out, I checked beneath the hood but found no obvious access to the bulb. So, I consulted the owner’s manual to find out how to replace it, and it said to take the car to a dealer. For a lightbulb?!? I don’t think so. What do I look like, an Aggie?

2013-09-14 16.06.34

Popping off plastic rivets from the wheel well cover

When in doubt, check YouTube! Sure enough, I found a step-by-step video on replacing the headlamp on my particular vehicle. Turns out that you have to access the headlight assembly from underneath. (Sometimes, I think there is a conspiracy among car manufacturers to make things look difficult, so that we’ll pay to have it fixed.)

Armed with a beach towel to protect me from the scalding-hot driveway, a paper towel to keep from damaging the new bulb with my bare fingers, a pair of screwdrivers and another tool that kinda looks like a split-tip screwdriver with a slight bend in the shaft (photo, right), I went to work.

Found the headlamp!

Found the headlamp!

The boys were in the middle of an all-out Nerf war that spanned the front & back yards and driveway, so I preemptively threatened anyone who stepped on me and told them to give me elbow room to work.

Getting dirty didn’t bother me, but the heat was ridiculous. Sweat kept dripping in my eyes, but I couldn’t wipe it away with greasy hands.

There were about three screws and three rivets holding the wheel well cover in place. I finally loosened and pulled it away from the bumper and found the cover to the light assembly. It screws on like a gas cover, just about a quarter-turn to lock into place. The bulb itself is easy to change. There are plastic hooks that you squeeze to release, then just pull out the bulb. The new bulb snaps right into place, and you turn to lock it just like the cap.

Ang the Grease Monkey

Ang the Grease Monkey

I decided to document my efforts, not as another how-to post, necessarily, but like the washing machine project from a few months ago, I want to encourage others to give it a try. Why pay for labor when it’s not a huge undertaking to fix it yourself? 🙂 Besides, I think it’s great for the boys to see that Mom isn’t afraid to get dirty and fix something, because I don’t want them to think that all women are helpless, prissy princesses.

Granted, I needed another shower and a nail brush when I got finished, but wow, what a great feeling to fix something myself!

Ms. Fix-It

A couple of years ago, I upgraded to a large-capacity washer and dryer. With five kids in the house, we needed it! Laundry is one of those things that becomes out of control very quickly (like paperwork and dishes), and when I don’t keep up with it (or delegate to the older two boys … and they remember to do it) during the week (like this past week), then it makes for a weekend of practically non-stop washing.

2013-06-16 19.16.11

The bolt beneath the agitator that refused to budge. WD-40 and a ratchet wrench finally got it loose.

So, when the kids left to go swimming with Dad for a couple of hours this afternoon, I thought I would tackle the mountains of laundry: heaping baskets of sorted reds, khakis and whites, and an overflowing two baskets’ worth of blues, not to mention the towels and sheets. I started a load of blues, and a few minutes into the cycle, it stopped and beeped with an error message. I thought perhaps I had put too many jeans in, so I took out some of the soggy clothes and tried restarting the cycle, to no avail. I broke down and Googled the make and model to try to troubleshoot an answer. All signs pointed to a clogged drain pump. Joy.

When the boys got home, I was up to my elbows in washing machine parts. I had watched a couple of how-to YouTube video on drain pumps and managed to disassemble both pumps from underneath the washer. Fortunately and unfortunately, they were both clear of debris.

The unfortunate part meant that the debris was between the basket and the plastic housing, not the drain pump. I don’t know if you’ve ever looked at a washing machine basket before, but the outside is like a gigantic cheese grater — it’s not something you can just reach your arm down and pick up what has lodged itself in there. Besides, it’s a very tight fit. I tried bbq tongs and a broomstick, but they were both too big &/or not long enough.

2013-06-16 20.06.29

You could grate a LOT of cheese with that basket!

Ms. Independent Streak wanted to do it all herself — pride and stubbornness kept me from asking for help, but my ex had come inside when he dropped off the boys, and he offered to help. He ended up being quite useful, since the machine was very heavy, and I couldn’t have lifted out the basket by myself (or even with the 13yo’s help, as much as he likes to think he’s practically a grown-up). After finally torquing a cuss-worthy bolt that refused to budge, we were able to get the basket out.

Three socks, two pair of underwear, a pair of swim trunks and a now-shredded t-shirt were hiding between the cheese grater and the washer housing.

With those culprits thrown away, reassembling the machine was a little easier than taking it apart, since I knew where everything went. I was a little frustrated that I removed the drain pumps for no reason, but at least now I know how to do it.

2013-06-16 20.26.12

This is a drain pump. It isn’t terribly complicated to remove/install, but my hands are sore from pinching all those clamps.

The washer is back in tip-top shape now, woohoo!

Take-away lessons from this experience:

  1. Even high-capacity washers have limits; don’t overfill them, or else you may have to dismantle the whole d@mn thing to retrieve the mangled clothing that slips over the edge of the basket.
  2. I am going to ask Santa for outlandish pink tools, so that no one messes with my stuff & I can find a proper wrench when I need it!
  3. I need more tools, especially an electric screwdriver.
  4. Cussing at inanimate objects (out of earshot of the kids) does not loosen stubborn bolts, but it makes me feel a little better.
  5. It’s a little awkward to work together on things around the house, since we don’t both live here anymore, but I’m grateful that we get along and can work together when we need to. I think that gives a positive impression to the boys that we really are trying to be “partner parents.”
  6. Note to self: do more laundry during the week, so it doesn’t pile up on the weekends.

DIY bunkbed repair

I’m filing this under the “Techie” category, simply because I’m so proud of myself for making it work! 🙂

Use toothpicks to fill stripped wood screw holes!

Four of the boys sleep on bunkbeds, and the eldest has his own futon. One of the bunkbeds has a metal frame, and the other is wood. I’ve noticed in recent weeks that the wood bed was getting wobbly, so I decided to investigate this weekend. I tried tightening the bolts (2 on each corner, so 8 total), and 6 out of the 8 were stripped!!

That was really scary, and I said an earnest thank-you prayer that the bed didn’t fall apart with someone (or two someones!) on it. The bolts are about 4″ long, so they would have had to wiggle a lot to work their way out, but still … something had to be done immediately.

I Googled “how to fix stripped wood screw” and was directed to a page with some great DIY tips. I decided to try the toothpick trick, and it worked!

Reinsert the bolt and torque it down; the toothpicks work as shims to fill in the stripped hole.

In essence, you insert 2-3 toothpicks into the stripped hole, then reinsert the bolt and torque it down till it’s good and snug. I did go ahead and disassemble the bunkbed and made it into two twin beds, because the boys were getting tired of the bunkbed, anyway, and I figured there would be less pressure on the bolts this way.

P.S. Super huge thanks to my almost-13yo who helped me separate the top & bottom bunks! It was certainly not a one-person job, and with my gimp knee, I was doing good just to get up off the floor from working on the bolts! 🙂

Ta-da! Nice & snug bolt!

The art of arm-twisting

Arm-twisting, persuasive argument, manipulation … call it what you will, but I got my way, and that’s all that matters! 😉

When I first broached the topic of Halloween costumes, all five of the boys wanted to be Mario. Then, the little two decided that they wanted to be Koopa Troopa turtles. I have basic sewing skills, but certainly not to the level of DIYing five costumes! All I could see were dollar signs.

(Halloween isn’t a holiday that we typically celebrate in full-force, anyway. It’s like the tooth fairy to me — it’s fun and they get treats from it, but we don’t make a big deal about it. We can go into an elaborate spiritual warfare discussion when they get a bit older. I don’t allow them to dress in scary costumes, anyway.)

*~*~ Then, I had an idea! ~*~*

I proposed my brilliant plan to the older two, knowing that if I got them on board, then convincing the little three would be a cinch. I suggested that they go as a rock band. We can find some old t-shirts, bandanas and jeans (either our own or some cheap ones from Goodwill – along with some second-hand vests and bling), and they get to RIP UP the shirts & jeans. I will buy some colored hair spray and let them spike their hair crazy. We have some toy instruments that they can carry for props. They were gung-ho as soon as I said, “You get to rip up the clothes.” The little three were sold when I said, “You can have crazy hair.” If they’re really adventuresome, I’ll even let them wear black eye make-up.

Who knew it would be so easy? 😉  Not only are they going to have fun trick-or-treating, but getting ready will be a fun activity to do together.

The only down side? They want me to dress up as a rocker, too!! LOL … we’ll see about that.